

A Simple CalDAV and CardDAV Service on a Raspberry Pi
NextCloud already offers a versatile tool to run a private cloud in your own home. However, this guide is intended for those who find that too much and simply want to synchronize appointments and contacts across all devices.
An uncomplicated CardDAV and CalDAV service for the Raspberry Pi. So, get yourself a coffee and let’s get started.
Who or What is Radicale
A personal calendar and contact server based on the CalDAV and CardDAV protocols that can be easily synchronized with various devices can be created with Radicale. For people who appreciate data privacy and ease of use, the application is particularly suitable if they wish to manage their own data themselves and not store it with large providers. Radicale is primarily aimed at individuals and small groups looking for a simple and reliable solution for managing calendars and address books.
Prerequisites
Or: What We Need
First, we update the system using sudo apt update && sudo apt upgrade -y
Then we can already install the future service with sudo apt install radicale -y.
The Configuration
After installing Radicale, the configuration is located in /etc/radical/config
But first, we open the /etc/default/radicale and enter ENABLE_RADICALE=yes there. Even though the file states that one should enter update-rc.d radicale enable if you want to have it as a system service.
Small note: update-rc-.d service name enable is obsolete. Instead, today one uses sudo systemctl enable service-name
Subsequently:
| |
We open these with sudo nano /etc/radical/config
I will only list the points here that we change. The config contains more points, but they are irrelevant for the basic configuration. Anyone who wants to dive deeper into the subject: There is plenty of documentation online.
| |
Now we must set the passwords for the users who should use our service.
To do this, we install apache2-utilsso that we can generate the passwords. Subsequently, we create the password for the first user:
| |
If additional users are to be added, we must do so via
sudo htpasswed -B /etc/radicale/users BENUTZERNAME.
The reason for this is that when creating the first user, we create the password file (sudo htpasswed -cB [...]), therefore for further users we only need to append it ( sudo htpasswd -B [...]).
After we have now created the user(s), we take care of the storage location. This does not exist yet, so we must create it and also adjust the permissions.
| |
Once that is done, we restart the Radicale service:
sudo systemctl restart radicale.service
With this, everything should now be running and we can take a look at it in the browser. To do this, we access the whole thing via the IP address of the Raspberry in the browser:
http://<pi-ip>:5232/
The whole thing should then look like this:
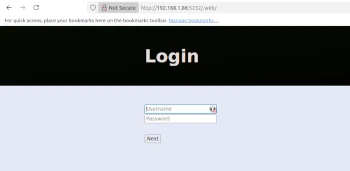
For login, you use your username and the password you assigned yourself.
With this, the CalDAV-CardDAV service is running on your Raspberry Pi.
Since the service is now running, we may have already created a calendar or even uploaded an .ics file, how do I connect my smartphone to it so that I have a) existing appointments in the phone and b) can also synchronize new appointments?
Continuing with: How to sync everything
First, we download the CalDAV5x app from the F-Droid store or, if you absolutely must get Google involved, from the Google Play Store.
Subsequently, we start the app, click on the plus symbol and create access to the Radical server this way.
As URL, enter:
http://<--IP-des-Raspberry-->/EuerBenutzername
In the two fields below, enter your username and the corresponding password again. With this, the connection should also be established.
And what about mail clients? Oh yes… I have Evolution too…
Summary:
- Open Evolution, add a new calendar.
- “Network” -> Select CalDAV
- Enter Radicale URL (e.g., http://server:5232/user/calendar )
- Enter username and password.
- Select calendar and synchronize.
Thus, the Radicale server can be used as a calendar source for Evolution and synchronized. Other mail clients should work similarly.
Troubleshooting
There are a few quirks that affect you if you have Starlink as an internet provider.
Starlink itself does not provide you with a fixed IP address that can be reached from the outside. Starlink uses CGNAT, which is essentially nothing other than sharing an IP address with others. In mobile networks, it is the same there too; you also share the IP address with others. An assignment of the IP address then takes place via the port.
However, to make the Radicale server accessible from the outside, there are various ways:
- You buy yourself a router (the simplest), or
- You find a provider through which you can set up a VPN tunnel so that the Pi is only accessible from the outside for you.
- You install a reverse proxy on the Raspberry Pi
I decided for the last two options and ended up with tailscale and nginx.
With Tailscale (works free of charge), I realize the tunnel to the Raspberry Pi. The reverse proxy (nginx) handles the forwarding from http to https for the CalDAV app.
Important here is that all devices (with Tailscale, up to 7 devices if you take the Free Plan) are in the same Tailscale network. Otherwise, the connection will not work.
How to set this up, you will learn next time.
For everyone else, the connection should also work without VPN and reverse proxy.