
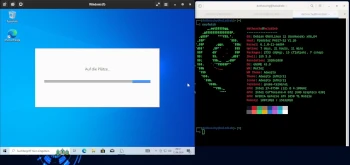
Since I am a professional driver and would also like to receive feedback on the data from my driver card myself, I acquired the software GloboFleet several years ago. Technically, I switched my operating system from Microsoft Windows to Debian GNU/Linux ; this put me in front of the problem that GloboFleet is pure Windows software that either does not run at all or only partially runs under Linux.
However, I did not feel like setting up a separate Windows partition on my laptop just for one program, so I decided on a virtual solution here. How to set this up and reach the point of actually using Windows and GloboFleet is described below.
As with all my tutorials, I use Debian GNU Linux as the base operating system and consequently also my approach with this operating system.
I point out that due to this tutorial, links are made to external sites that may use cookies and trackers. I have no influence on this and derive no benefit from it.
Let’s get started
As a virtual machine, we use KVM. KVM can be installed quite easily under Debian GNU Linux.
First, we bring our package management up to date as usual.
sudo apt update
After that, install QEMU and KVM:
sudo apt install qemu-system libvirt-daemon-system -y
A few more programs need to be installed for this.
So that we do not have to run the virtual machine as a superuser after installation every time, we add our regular user to the libvirt group:
sudo adduser $USER libvirt
Operating the VM and installing Windows
As always with Linux, you also have the choice here. Do I want a graphical interface or is the console enough for me?!
I decided on the former and installed the Virtual Machine Manager ( virt-manager ). Since this component is also part of Debian Bookworm, this is sufficient:
sudo apt install virt-manager -y
Getting and installing Windows
Windows can be downloaded legally and free of charge from Microsoft. However, you must have a license key to use it for a longer period of time. If you do not have one, there are other, illegal ways to activate Windows. Since this procedure is also mentioned in many computer magazines, I will write about it below.
We download Windows at the following address: https://www.microsoft.com/de-de/software-download/windows10ISO
In the Virtual Machine Manager, we now select Create New VM. Click on the monitor at the top left. In the opening window, if not specified beforehand, select Local Installation Medium. In the next window, select the path where the Windows image was saved, remove the checkmark at the end of the window, and search for Windows 10 or the Windows version to be installed via the text field. Click on Continue, and in the next window enter the amount of RAM and the number of processor cores. Attention: Your base system also needs memory, so do not specify the entire amount of RAM you have in your computer here.
Then follow the instructions.
Start the VM; Windows will be installed as you know it.
Once Windows is installed, you can continue with the rest. That is, install and set up GloboFleet if you own it. Activating Windows even without a digital license key
The ways to do this are diverse.
In case you have installed Linux on a PC delivered with Windows, you can read out the serial number:
sudo strings /sys/firmware/acpi/tables/MSDM
If not, there is another way. Open Windows PowerShell as administrator. In the opening window, type the following command:
irm https://get.activated.win | iex
Then follow the instructions on the screen or simply press 1 when the selection menu comes up.
Alternatively, you can read about it here: https://de.minitool.com/nachrichten/windows-10-mit-cmd-aktivieren.html
That’s it.
Troubleshooting
For example, I had the problem that the card reader was not recognized. However, this could be solved in the following way:
Click on Add Device at the bottom under Show Details of Virtual Devices.
In the next window, select USB Host Device and there select your card reader device and click Finish.
Restart the VM Manager and the card reader should be recognized under Windows.
It would certainly be nicer if GloboFleet also released a Linux version of their software. But as it is, demand regulates supply. There was once a project for Linux on GitHub, but that has not been continued for several years.
In case you have deleted the Windows 10 image, download it again, because without it the VM does not work 🙂 Network ‘default’ is not active
Occasionally, it happens that the network interface has not been started. Then the error message Network ‘default’ is not active appears.
This can be fixed very easily via the terminal:
First, we enter the command in the terminal:
sudo virsh net-list --all
With this, we get an overview of whether the ‘default’ network interface is indeed inactive. If it is so, the next instruction comes:
sudo virsh net-start --all
Repeat the first command to see if it has been started.
As you can see, ‘default’ is set to automatic start with me. If you have to start it manually, it will say no for you.
sudo virsh net-autostart --all
changes this, so that ‘default’ will be started automatically next time.