
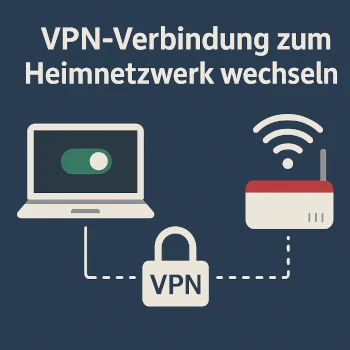
How to Trick Others into Thinking You’re at Home
The idea for this came about a few days ago when I switched to an alternative TV provider. Since I don’t want to advertise here, it doesn’t matter which one it is yet. The problem with this provider is that it blocks certain TV programs if you are not on the home network. Sure, I could add this option for a small fee, but why pay extra when I can save money?! And also because I can now explain how to set up a VPN with a Fritz!Box. Now that I have one.
That means I just need to make the TV client / TV provider think I am at home, even though I’m not. But how does that work? I will explain this in this tutorial. Please don’t misunderstand this: I can use a VPN connection to the home network to bypass such things. However, you should also view it from the perspective that a VPN connection provides more security on public networks. Because anyone who likes to sit with their laptop in an internet café should be aware that such places are often used by people who don’t just want to have a coffee and surf the web with their laptop there. Such an access point can easily be spoofed, and then your data will be read. Everything: bank account login credentials, Facebook, Instagram, etc. If I use a VPN connection, then the connection is already encrypted once the laptop leaves, and such eavesdropping methods, so-called Man-in-the-Middle attacks, no longer work.
Such a VPN connection is also suitable, among other things, if you, like me currently, have an internet provider that does not provide a public IP address.
With providers like Telekom, Vodafone, etc., you get your own IP address through which you, or your router, can be identified. With providers like Starlink, this is not the case. There, you share an IP address with several other users, similar to mobile networks.
Starlink uses CGNAT. CGNAT is a technique where an internet provider uses a single public internet address for many users simultaneously.
Each user gets their own private address that is not directly visible on the internet. When a user does something on the internet, their private address is converted by CGNAT into the shared public address so that the data can find its way back to the correct user.
This means: Multiple users share an internet address, which can lead to certain things like running your own servers becoming difficult or impossible. Providers do this because there are not enough individual internet addresses for everyone. A VPN connection can bypass such a situation.
VPN is the Solution
Many companies already use this option to allow their employees in home office to access the company network. The choices for what to use to establish a VPN connection vary.
I will just mention this here before questions arise about what alternatives there are.
In this tutorial, we will use WireGuard in combination with a Fritz!Box, although there is also the possibility of using OpenVPN or IPSec. I have put together a table here that should show the differences:
| Question from the Home User’s Perspective | WireGuard | OpenVPN | IPsec |
|---|---|---|---|
| What do I need it for? | Securely connect to your home network or Fritz!Box from outside, e.g., to access a NAS or files. | Same: securely connect to your home network or a VPN service. | Often used for corporate VPNs or router-to-router connections; more “business technology.” |
| How “modern” is it? | Very modern, new technology designed for security and speed. | Proven and in use for many years, very widespread. | Classic in the enterprise sector, long-standing standard on routers and in companies. |
| Speed for surfing/streaming | Usually the fastest, often with hardly any difference from normal internet. | Can be slightly slower but is usually sufficient for surfing and streaming. | In practice, usually faster than OpenVPN but often a bit slower than WireGuard. |
| How easily can the provider block me? | Uses a special data path (UDP), which can be detected and blocked more easily in some networks. | Can disguise itself well; to outsiders it often looks like normal web traffic (e.g., via port 443). | Has typical, fixed characteristics and ports; is relatively easily recognized and blocked by strict networks. |
| How complex is the setup for non-experts? | Often simple for the user: install an app, scan a QR code/file from the provider, and you’re done; setting up the server is slightly more technical. | Depending on the provider: often simple with a ready-made app; setting up your own server can be quite complex. | Most complicated for private individuals, many settings required; often configured via Fritz!Box assistants or corporate IT. |
| Where does it typically run? | On many routers (e.g., modern open-source firmware routers), smartphones, and PCs; on Windows/macOS sometimes via additional software. | Used by very many VPN services; apps are available for all common devices. | Often built directly into the operating system (Windows, iOS, Android) or provider/company routers. |
| What does an unsuspecting user notice? | Usually: open the app, toggle switch to “On”, surf as usual; connection is fast and unobtrusive. | Similar: open the app, log in, connect; sometimes a slightly longer connection time. | Often pre-configured by the employer or set up via the router; you just click “Connect” and work as usual. |
| Security from a home perspective | Very secure for typical private user purposes if properly configured. | Also very secure, proven in everyday use for many years. | Also secure, but due to complexity easier to misconfigure – private users rarely do this themselves. |
Ok, continuing with the text. I’ll skip the classic “What do we need” section because we will build everything using our Linux operating system’s own tools. As mentioned, in this tutorial I use WireGuard and a Fritz!Box. If you don’t have one, you should find a corresponding VPN function in your router. The Deutsche Telekom Speedport router has such a feature and uses WireGuard by default.
Small Side Note
One small note for Starlink users: Don’t worry, this VPN connection also works with Starlink without needing any extra settings. The important thing is that besides the Gen3, you have another router in use that manages the internet connection. So the Gen3 is in bypass mode, and the correct router handles the rest.
Setting up WireGuard
In the first step, we open the configuration menu of our Fritz!Box in the browser. Either via https://fritz.box or https://192.168.178.1. The latter only works if you haven’t changed the IP address of the Fritz!Box.
Good, continuing with the text. In the menu, go to Internet -> Shares and select Link WireGuard.
The configuration is actually quite uncomplicated.
We select VPN (WireGuard) there and then click on Add Connection. In the next step, it’s important to Select Single Device, or leave it selected, and click Continue. On the next page, simply set a name for the connection and click Finish. The Fritz!Box will now request confirmation for the change. If you have a phone connected to the Fritz!Box, just enter what the message displays; alternatively, you can click the link below. The LEDs on the Fritz!Box start blinking; simply press a switch on the router where it’s blinking, and the configuration is confirmed.
In the last window that opens, you then have the option to set up the configuration via QR code on the device or download the configuration. We choose the latter.
With this, the setup on the Fritz!Box is complete, and we now turn to configuring it under Linux.
Installing WireGuard on the Linux Laptop
Here we need the WireGuard client and the WireGuard tools.
So we do the following:
sudo apt update && sudo apt install wireguard wireguard-tools
Once installed, we can integrate the WireGuard configuration.
We do this via sudo nmcli connection import type wireguard file wg-laptop-cmr.conf Please adjust the name of the config file and also the path here.
In the Network settings, the WireGuard connection should now appear and be active. On Cinnamon, you can conveniently enable and disable the VPN connection via the network icon in the taskbar.
If the VPN connection is active, let’s test it out.
Since I use my laptop’s hotspot function on my smartphone when traveling to get online, I also connect my laptop to my smartphone here at home so as to disappear from the home network :D
To test this now, simply enter the following in the terminal:
dig @192.168.178.1 heise.de
or
dig heise.de
Both should provide a clean response.
Another advantage is: If you operate AdGuard Home and have entered it network-wide as DNS in your router, you use it as well. This way, you are also protected from tracking and annoying ads.
On to the next step for the lazy ones
I am one of those who sometimes forgets to turn something on when I’m traveling. So what if there was a way to make this happen automatically?
No problem: Continue reading below for the VPN connection for lazy people :D
How to automate it
In principle, we create two scripts.
One script solely acts as the switch to activate or deactivate the VPN. Another script…
But first, let’s check which devices are actually present and what is connected.
For this, we briefly nail nmcli devices into the console.
The output should look approximately like this:
| |
Note down the names:
- your LAN interface → e.g., enp3s0
- your WLAN interface → e.g., wlp2s0
- your WireGuard VPN → e.g., WgLaptop or whatever NetworkManager calls it
Now let’s build the script. Important! The names of the individual devices must still be adjusted; therefore, anyone copying the script 1:1 should keep this in mind if it doesn’t work.
We create the script with sudo nano /usr/local/bin/net-auto.sh
| |
Subsequently sudo chmod +x /usr/local/bin/net-auto.sh
Next, we need the second script as a service file in systemd, which we create with sudo nano /etc/systemd/system/net-auto.service:
| |
Actually, if you’re really lazy, you’d still need a timer that checks every 10 seconds whether a LAN connection exists or if it’s WLAN. Provided you connect your laptop at home via LAN cable (yes, I know, WLAN is easier, but LAN is more stable, especially when gaming.)
But that’s a story I’ll tell another time. If you now also check out my tutorial on AdGuard Home , you get an additional ad and tracking filter that also works while traveling.